An iCar for a new perspective
Camera cars and -locomotives for model trains are around in the hobby for a while. Although a cool gadget, those units are pretty expensive given the fact that they’re not too often in use and the excitement wears off quite quickly. I was always toying with the idea of running a camera train on the BTB layout as well as trying a laser cut kit. Then I learned about the iCar kit offered by Minuteman Scale Models and as soon as I finally got myself an iPhone I was ready to tackle this project.
What’s in the box?
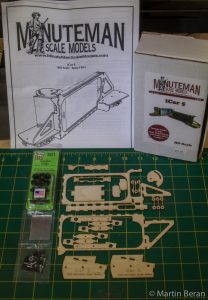 Minuteman Scale Models is one of the numerous small businesses in the industry that offers kits and parts for the serious modeler and is also widely known for being the new distributor of Scalecoat hobby paints. I ordered the kit online Minuteman iCar for about $30.- and had the box in the mail within a few days. The kit contains all components you need to build your very own version of the iCar- except for the smart phone of course. Besides of the nicely cut wooden pieces, Kadee trucks and couplers as well as some screws, a small mirror and a detailed manual with instructions for assembly complete the parts list. As with every kit it is highly recommended to get familiar with all the parts and the steps involved in assembling the car. This advice is even more important to be followed with the particular project as some parts look pretty much the same and it is really easy take one piece for another. Therefore check, double check and check again before you proceed!
Building the iCar
We begin with building the cradle structure that later holds the phone and basically resembles the frame of the car. The wooden pieces are precisely cut. Therefore cleaning is kept to a 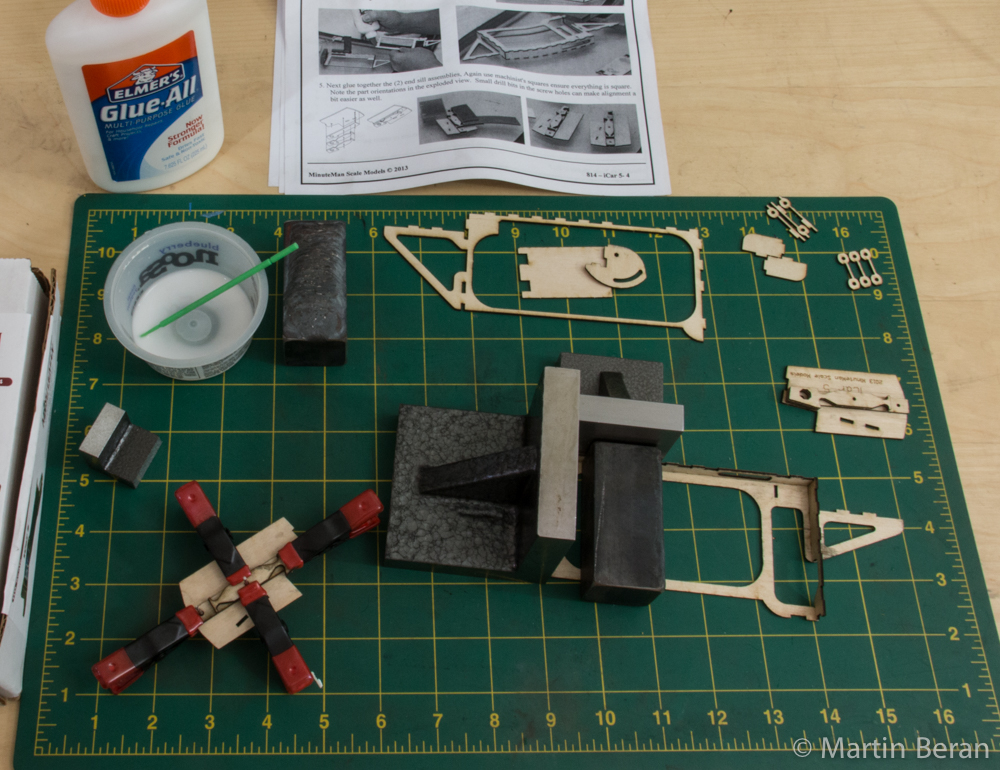 minimum and the individual parts fit together pretty well. If the goal is to just get a working model then this is as much of an effort needed but if the idea is to give the car a coat of paint then some more finishing work pays off later on. Slightly thinned white glue worked well to glue the wooden parts. I used a micro brush to get the glue into the areas it needed to go. Again, make sure the correct parts are attached to each other in the right order. this is especially true for the end platforms and the stacked truck/coupler mounts (the lettering faces down!!). When attaching the end platforms to the phone cradle make sure everything is square, straight and true.
 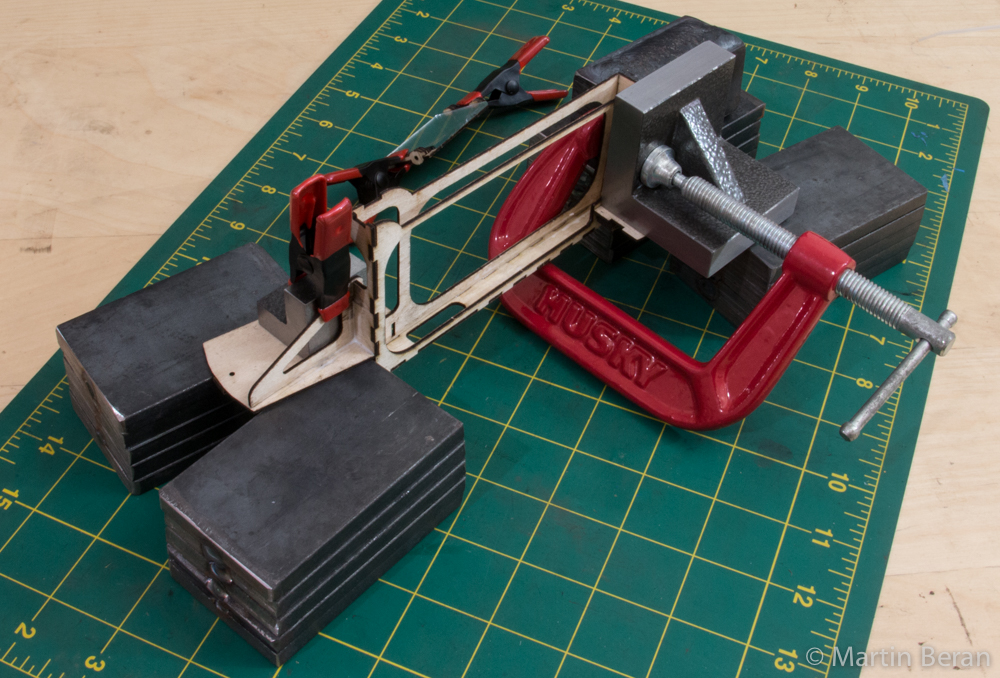 Machinist squares, angles and steel weights help to achieve the desired position. In addition to that, small clamps hold the sub-assemblies aligned while the glue dries. Patience is a gift for the modeler and this project is no exception. It took me about two evenings to assemble the structure. Quickly the iCar gained shape so that the motivation was high to keep going. Once the connection had cured I checked everything for proper alignment. The sub assembly for the mirror came together in parallel to the main frame. I used gel type super glue to fix the mirror to the wooden carrier.
Details and a paint job
While working on this car I decided to give it a little bit more personality by adding some details and paint it in a nice, flashy paint scheme. Before the fun of (super-)detailing began the tedious task of sanding and filling for an even finish had to be done. 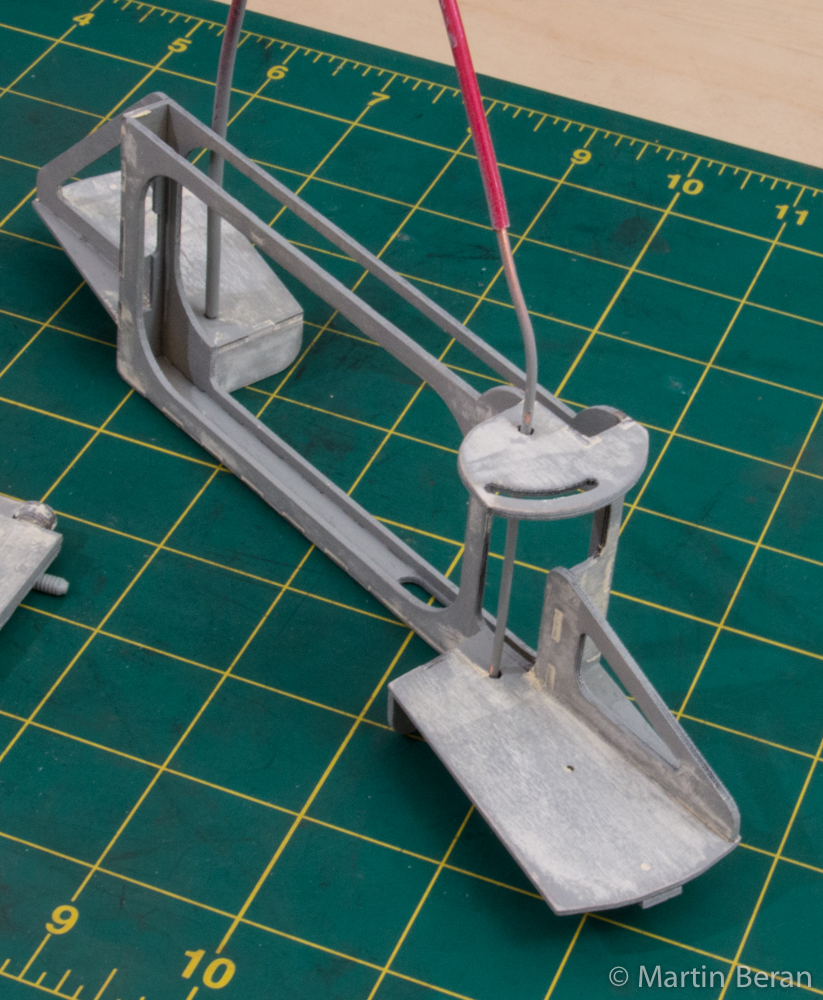 Elmer’s wood filler and light gray spray paint came in handy to provide a smooth finish. I repeated sanding – filling- base coat circle two times until the surface was smooth enough for the actual paint job. But before the car got its bright safety-yellow finish it was time for some details to be added. For the hand rails I used fine brass wire supported by Details Associates eye bolts. I had a set of freight car brake gear parts from Central Valley which I utilized to add character to the undercarriage. One more thin brass wire mimicing the air brake line running along the lower side of the cradle as well as a break wheel stand on the back platform completed the model. Once everything was secured in place the final paint come on. Due to the lack of access to an airbrush I made use of the good old spray cans. I painted the visible parts yellow and the undersides of the platforms in a dark, German-Gray color. Decals would have been nice but time constraints due to the upcoming move forced me to label the car for the “unknown RR”.
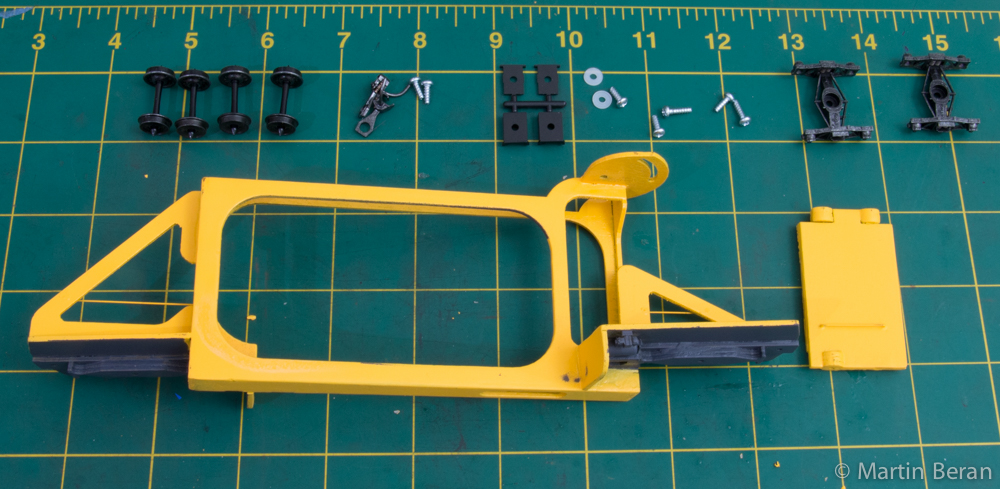 Last but not least a good mist of Dull-cote tuned down the shininess of the colors as well as provided some teeth for the weathering powders. Even a valuable, well maintained but seldom used car collects some signs of usage. Pan Pastells helped to create that very look.
Final assembly and test run
Once the the paint has dried and weathering has been completed it is time to put everything together. There are 7 screws in two different sizes. The longer ones are for mounting the trucks while the rest holds the mirror assembly in place as well as the couplers. Predrilled holes make landing the screws an easy task. 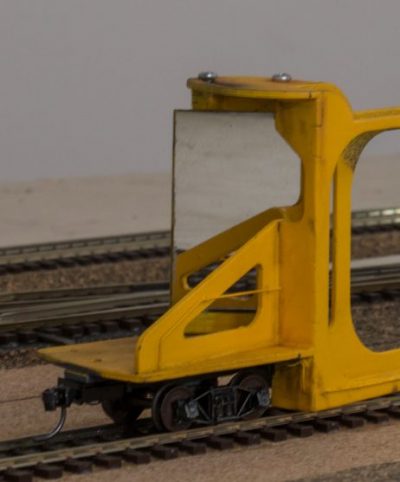
The trucks that came with the kit are old fashion Arch Bar type. I am thinking of replacing them with a more modern style by chance in the future. This part is similar to other car kits. in order to set the right angle for the mirror, slide the iPhone into cradle and switch to the camera App. Rotate the mirror till you see the desired part of the track ahead and tighten the screws.
With the phone in, the car has enough weight for the first test run. Before I coupled a trustworthy GP60 to the car I gave it some passes over critical track work. All in all traction is good. The low center of gravity is helpful for sure. As the BTB layout has smooth grade transitions the low clearance is not an issue. I recognized that clearance under low hanging catenary is not enough to let the iCar go under. So I might remodel the mirror mounting to lower the top a little bit one day (read – probably never).
…and ACTION!
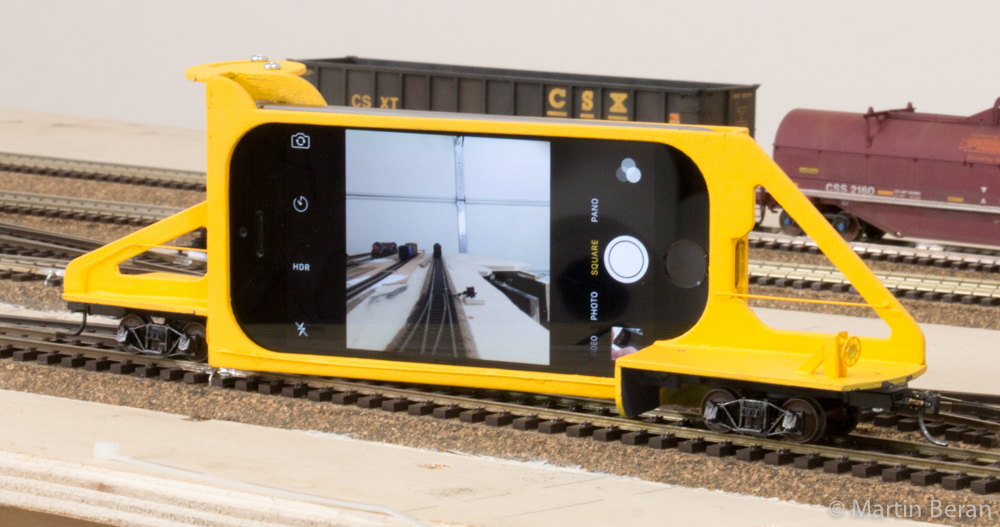
So far so good- but how does this all work out for the purpose I put all the energy in? Well, it actually works out pretty well. As i was preparing the layout for the upcoming move I had the iCar-Special train travel the BTB tracks up and down while filming the journey. In order to take the shot change the setting on the iPhone to video and press the red button so that it changes to a square. Now the recording is on – sound included! The screen of the phone gives you a life view. Due to the mirror the view is flipped which can be confusing at the first time. As far as i know there is no setting on the iPhone to mirror the recording (there might be a special App out there). In my opinion this is not a big deal as the whole movie can be flipped back to normal in post production. During the first takes I noticed occassional, slight shaking which had its reason in a loose fit of the phone in the cradle. A small cable tie wedged in between the frame and the phone fixed this in no time. Uneven track, especially at switches still cause unsteady pictures but I decided that this is good enough for now.
So- how does such a movie look like? Here is an example- the last run on the BTB (at least in the North West Indiana location):
Conclusion and lessons learned
Assembling and detailing the iCar kit was fun and provided a good first experience with laser cut kits. The result is an ingenious but low cost camera car that fulfills the purpose and provides opportunities for future video captures of the BTB layout.
- It is important to take the time in order to become familiar with the parts. Many look alike…
- Proper alignment and square assembly is mandatory for smooth operation. Machinist squares and steel angles help to ensure true corners.
- Filling and sanding lead to a smooth finish, especially on wooden kits.
- Taking videos form the engineers perspective is fun but also takes considerable time