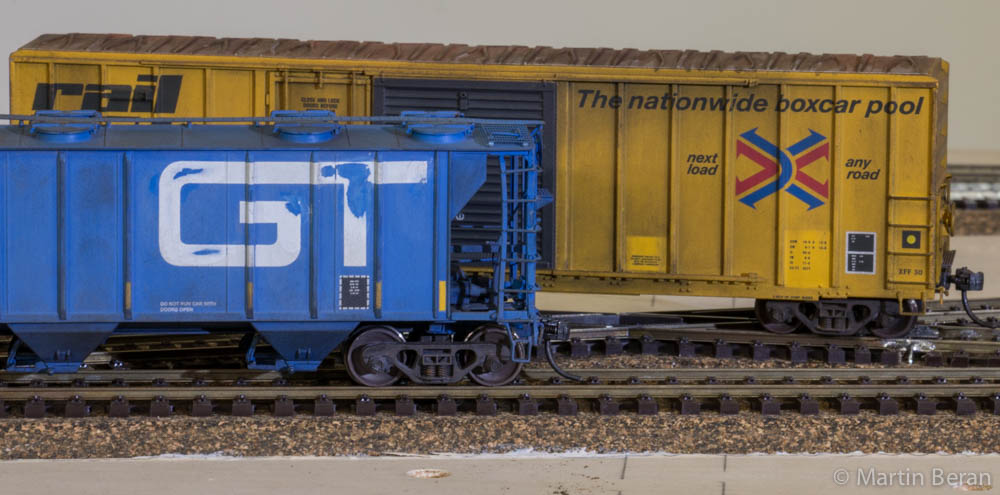
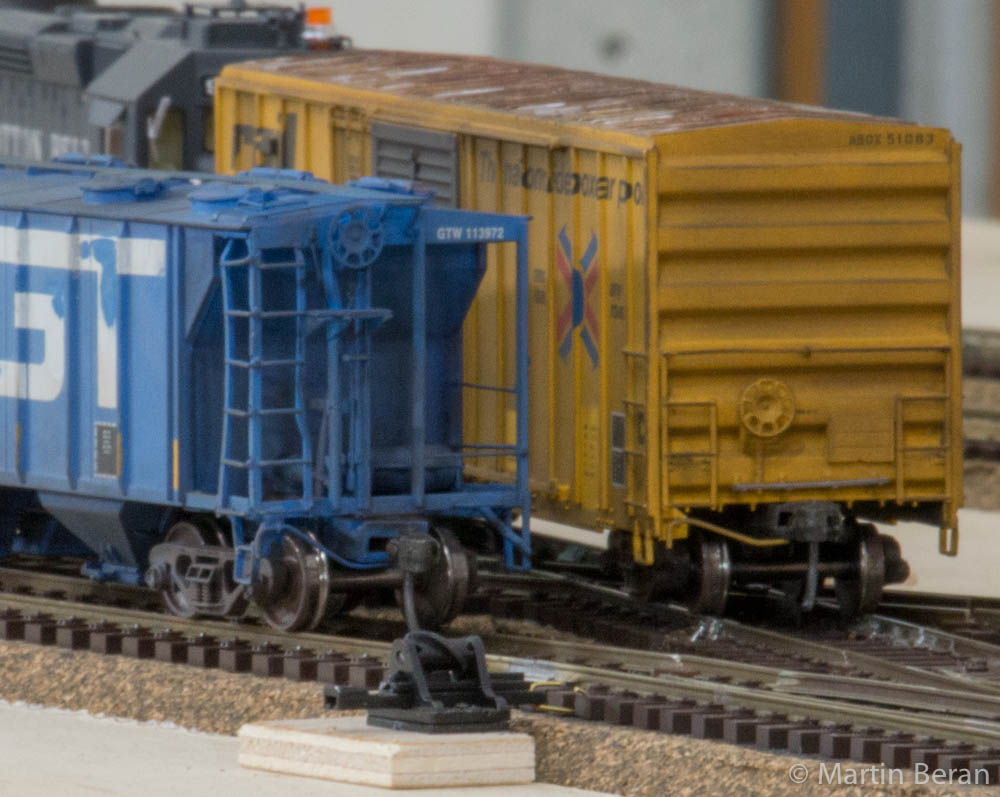
Dressed up in grime!
This post is about the latest (finished) car weathering and detailing project. The Grand Trunk covered hopper as well as the Rail Box boxcar are favorites of mine, waiting for some upgrades and traces of dirt for a while.
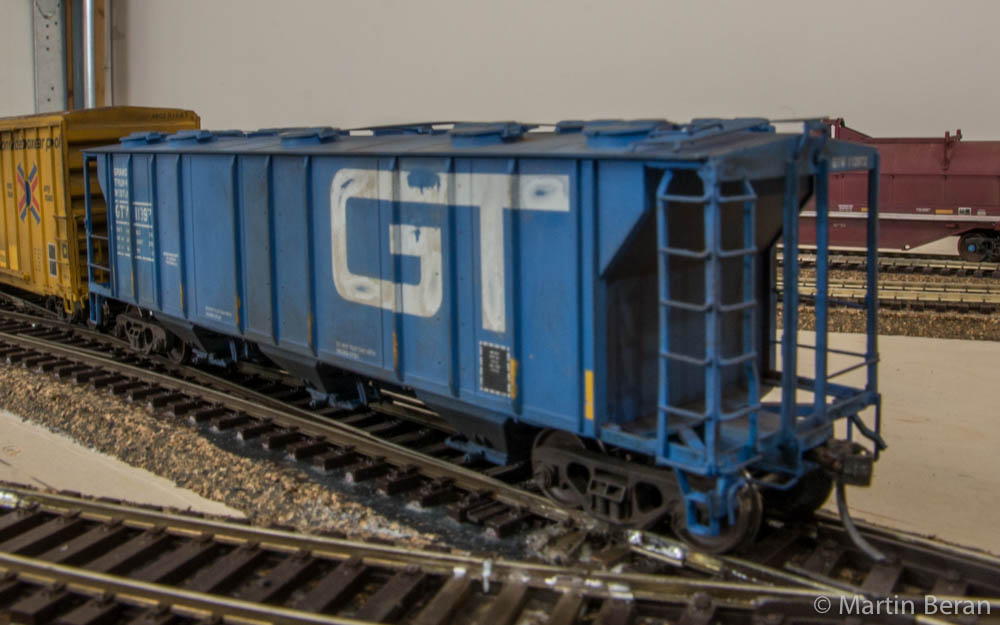
Grand Trunk Western – #113972
This car started life as an Athearn model which I picked up at a train show. Having lived in the Metro Detroit area the “Grand Trunk” is so to say a “home road” even it has long before joined the ranks of the “fallen flags” railroads. For a moderate price of about $27.- we got a good looking car featuring nice, crisp lettering.
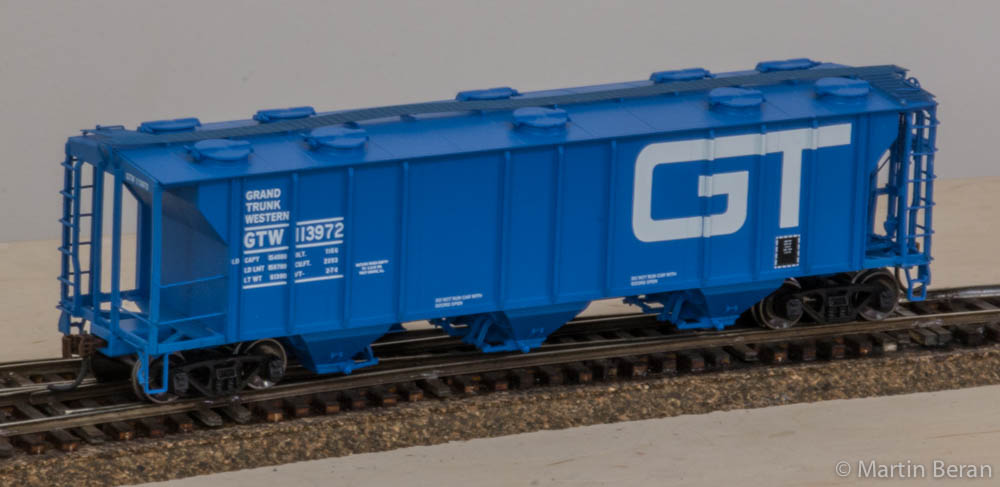
In addition to give it a weathering job I planned to try some detailing, add safety striping and swap out the trucks with supposibly better looking and running ones from Kadee.
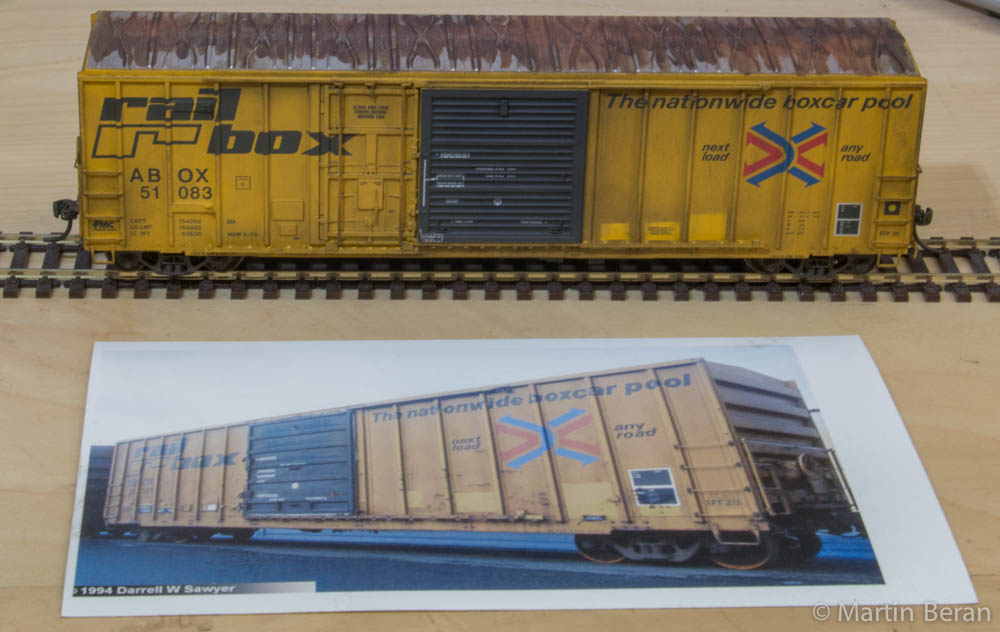
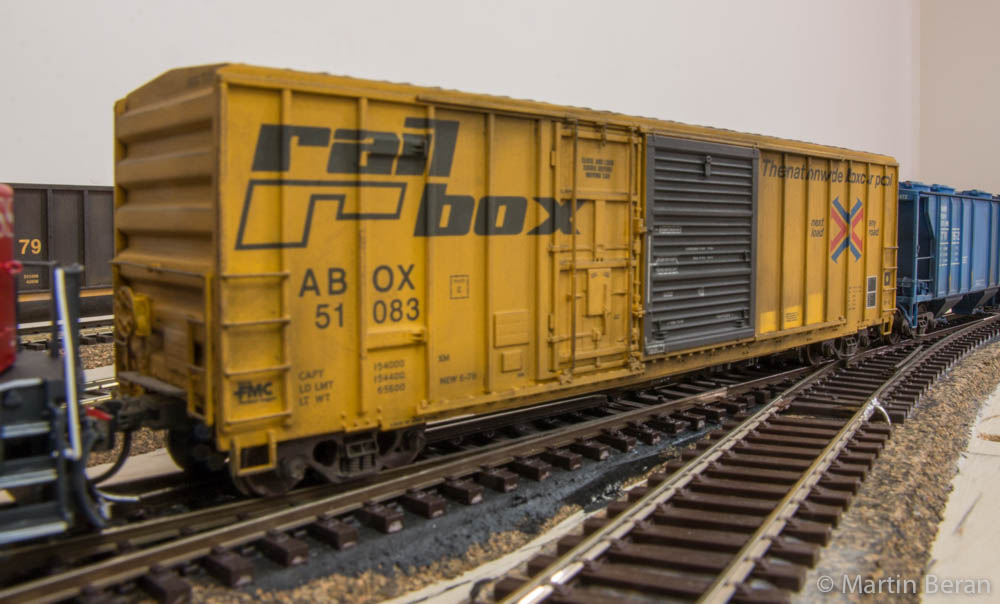
ABOX – Rail Box #51083
I think this car got into my possession pruning the same event – Trainfest, Nov 14/15 2015 in Milwaukee. It’s a nicely done model by Exact Rail. Weathering was the main goal as well as well as adding coupler levers plus Kadee trucks. Last but not least this time I wanted it to give it a try simulating rust on the roof using using oil paints.
Adding coupler levers
Allin all the level of detail at both models is good enough for me. The only things missing were the coupler levers. 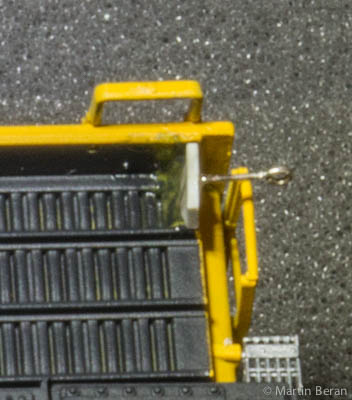 A small, barely noticable detail but once you know it should be there its odd if it does not show.
The good news is that coupler levers are easy to add. First we need a mounting bracket for the rod. I used eye bolts from Detail Associates (#2206).
On the RailBox car two small squares of styrene provide a base for the fixture while the GTW hopper had a molding that could be used. After drilling the holes some AC glue tacked the eyebolts in place.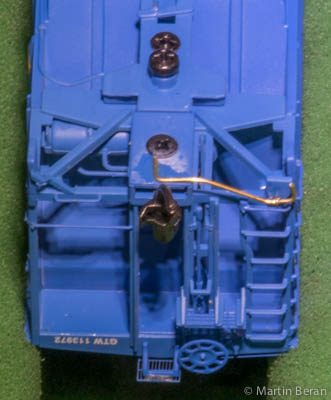 Next came the lever, made out of 0.10 brass rod. A size smaller would have been more to scale but I only had that size in stock and once painted the size looks ok. After eye-balling, bending and test fitting the shape was about right. Finally the levers where guided through the eye bolt holes and fixed with glue to the underside of the coupler boxes.
New trucks…
Even both cars had decent modeled trucks I decided to swap them out with Kadee roller bearing – self centering trucks equipped with code 88- semi scale wheels. Well, the result was not too delightful. I learned that, due to the design the trucks tend to disassemble during installation and the self-centering feature is not that great. But the detail is good so they stay on. Unfortunately tests on the layout shoed that semi-scale wheels are not to be on the current BTB-layout. Derailments happened on pretty much every switch, be it PECO, Tillig or hand laid. So the original axels went into the new trucks.
Reflector stripes for the GTW hopper
I like the combination of blue and yellow! Lets think about the amazing Santa Fe freight diesels or this nice pair of cars. Prototype pictures are always a good source of inspiration and in case of the GTW hopper I found that reflector stripes had been added for added visibility later in their life. So i decided to give it a try with this model. Micoscale offers a decal set for yellow reflector strips (MC-4389) representing the 4″x18″ type. Each corner of the car got one and in addition I painted parts of some side-ribs safety yellow in approximately the same length.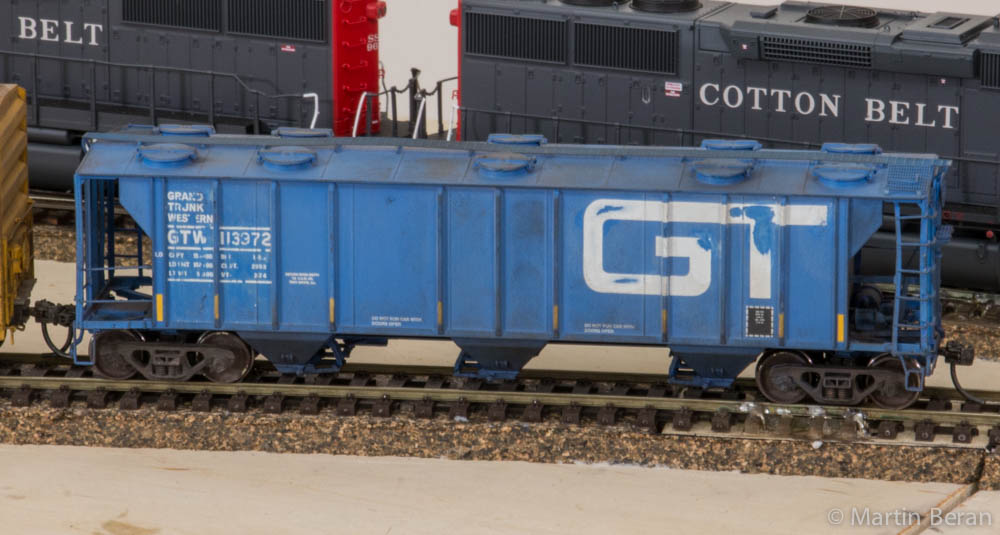
The strips stand out nicely and provide some contrast to the blue and white. I admit that the arrangement is not entirely prototypical but let’s pretend the Grand Trunk tested several methods of how to improve visibilty on this car, well before reflector stripes were required by the FAR in 2005.
Make them look like they make money!
After installing the details and decals the fun began. Well, first a good overpay from a Dullcote “rattle can” provided the base for the mix of Pan Pastells and weathering powder from Bragdon Enterprises. A photo of a real Rail Box car showed some light spots where some old lettering has been overpainted. I wanted to replicate that and simply put on masking tape while applying the grime. I also learned that yellow takes on dark weathering powders really well and i almost overdid it. Actually the goal was a modestly weathered car but I think I still can live with the result. Part of the issue was my bright work light so that the “darkness” of the applied dirt did not show right away. But once on the layout it turned out looking filthier than expected. For the roof I a fine layer of odorless Terpentine to give the oil paints a way to “flow”. Burnt Sienna and Raw Umber are the colors used to simulate rust overwhelming the galvanized panels. Followed by another coat of Dullcote weathering powder added texture and “dullness”. Again, the outcome was a little bit on the heavy side but I am still fine with it.
For the blue hopper the first order of business was to soften up the paint of the GT herald with nail polish remover. This is good paint put on in a solid layer so it takes some patience till parts can be swiped/scraped away with a Q-tip. Light gray pastells and blue weathering powder give the sides and roof a faded look. I wished I had an airbrush on hand for the frame and lower parts of the bins. It turned out ok but a tad more of even grime would have not hurt.
Conclusion and lessions learned:
Both cars provided a lot of fun turning them into models of hard working rolling stock. I tried new techniques and the result is good enough to keep them.
- Coupler levelers are easy to add and enhance the look of the car ends
- Kadee “HGC” High Gravity Compound trucks seem to be a little bit too fragile for my taste
- Code 88, semi-scale wheel sets are no option for the current BTB layout
- bright cars are easily too “well done” when applying dark weathering agents, use caution!
- Frequently check results of weathering in lighting similar to layout. Bright light on the work bench can fool you!
- Frame and lower parts of bins at hoppers can be hard to reach with powders. An airbrush might be a good option.